How to Create List-in-List UI in Unity
Building a List UI with Variable-Height Elements in uGUI
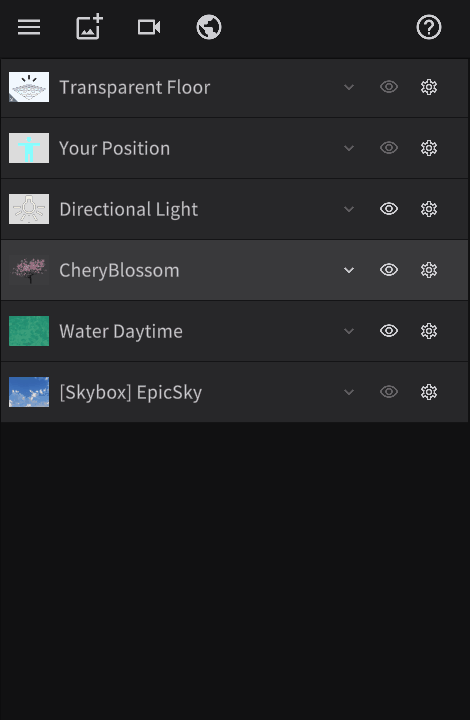
Suppose you want to create a list-style UI like the one below in Unity's uGUI.
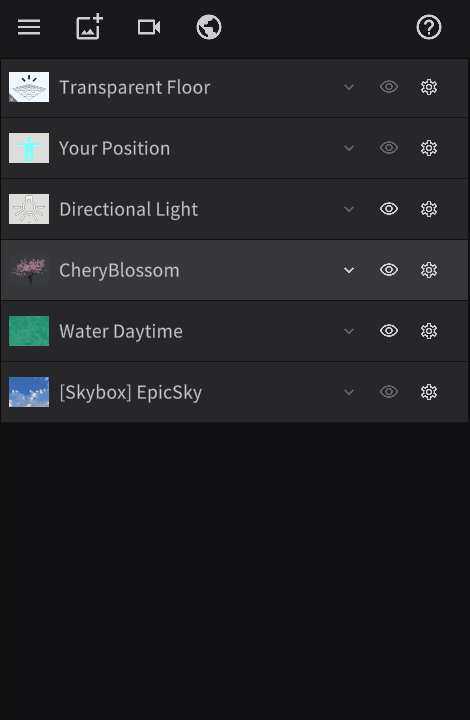
The height of the CherryBlossom row changes when a button is clicked — that is, the height of a list item changes dynamically based on user interaction.
As CherryBlossom resizes, the rows below it (Water Daytime and [Skybox] EpicSky) shift up and down accordingly.
This kind of UI is common in editor-style tools.
However, implementing it in uGUI is surprisingly tricky — so let's walk through how to do it!
Manually Calculating Height and Pos Y Is Too Much Work
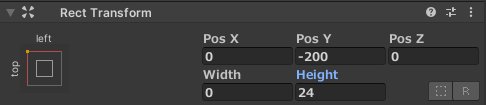
One approach is to calculate Rect Transform's Height to control element sizes.
Similarly, you can dynamically calculate Pos Y to adjust vertical positioning.
In theory, writing a script that computes Height and Pos Y for every element in the list would achieve the goal.
But this approach is extremely costly in terms of development effort.
If you plan to add features like item insertion, deletion, or sorting down the line, you'll need to account for Height and Pos Y recalculation in every one of those features.
Isn't there a way to automatically adjust Height and Pos Y, like HTML's <ul> and <li> tags?
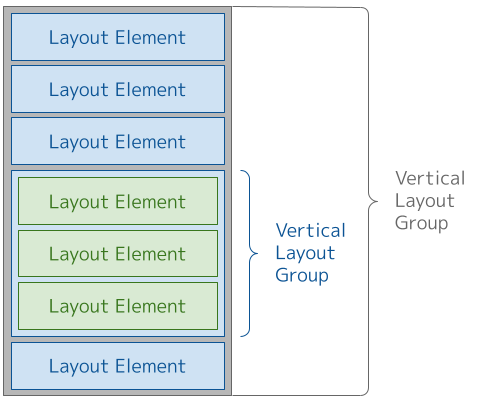
Vertical Layout Group Handles Height and Pos Y Automatically!
uGUI does have a built-in mechanism for automatic layout adjustment.
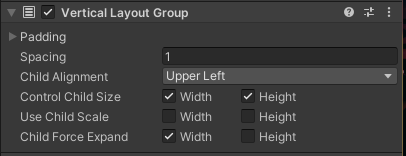
That's Vertical Layout Group!
First, to illustrate with a simple case — here's how to automate only Pos Y calculation, where element heights are static.

Attach Vertical Layout Group to the parent GameObject of your list items. This is the equivalent of <ul> in HTML.
Next, attach Layout Element to each list item GameObject. This is the equivalent of <li> in HTML.
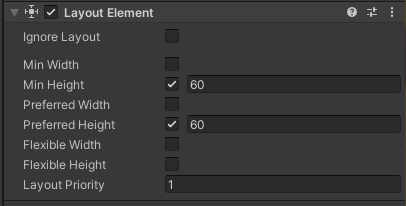
By setting values for Preferred Height and Min Height, you can fix each element's height.
No scripting required at this point — this alone is enough to enable automatic Pos Y calculation!
When the List Contains a Nested List
Next, let's consider automating Height.
Wanting to dynamically adjust a list item's Height typically means the item itself contains another list — a list within a list.
The situation looks like this:
For list-in-list scenarios like this, simply nest Vertical Layout Group!
As shown above, you can place a Vertical Layout Group alongside a Layout Element at the same level without any issues.
In my testing, nesting up to 3 levels deep worked without problems.
This gives you automatic Height adjustment for nested list items as well!
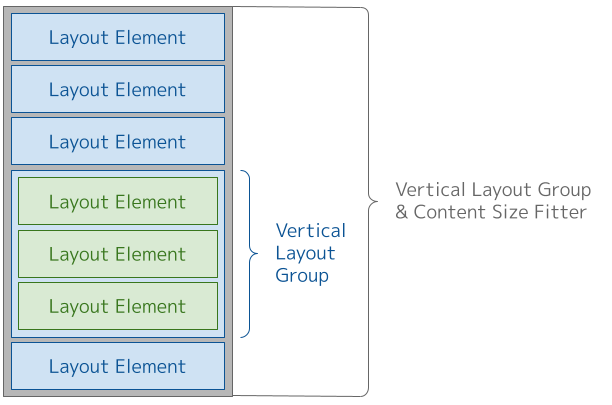
Fitting the List Height to Its Contents
Now suppose you have a UI where the number of items in the list changes dynamically, like this:
In this case, the list's height must expand or contract to fit however many items it contains.
You might think Vertical Layout Group alone would handle this, but it actually can't on its own.
For this, use Content Size Fitter!

Simply add Content Size Fitter to the same GameObject that has Vertical Layout Group, and the list will snap to fit its contents perfectly!
How to Combine Everything
There will be situations where you want to use Vertical Layout Group, Layout Element, and Content Size Fitter together.
When doing so, if the components aren't configured properly, their behaviors can conflict and produce confusing results.
To avoid this, keep the following guidelines in mind.
Set Layout Element on Items with Fixed Heights
Attach Layout Element to any item whose height does not change, and set Min Height and Preferred Height on it.
Set Vertical Layout Group on Items with Variable Heights
If an item contains a list, attach Vertical Layout Group to it.
If that list contains yet another list, attach Vertical Layout Group there too.
And if there's a list within that list, attach it there as well.
In short: attach Vertical Layout Group to every item whose height is determined by its child elements.
Set Content Size Fitter Only on the Topmost List Parent
Finally, attach Content Size Fitter only to the topmost parent GameObject of the outermost list.
There is no need to set it anywhere else. (Setting it elsewhere will trigger warnings from Unity.)
Putting it all together, the component hierarchy looks like this:
Bonus: UI Toolkit Handles Layout Automatically
Everything covered so far was about achieving automatic layout with uGUI. However, if you use UI Toolkit (available since Unity 2020.1), dimensions and positioning are adjusted automatically without any extra configuration. Very convenient!
Closing Notes
The following resources were referenced while writing this article. Thank you!
The screenshots used in this article are from STYLY Studio, a service operated by our company. Feel free to check it out if you're interested!
https://styly.cc/ja/manual/scene-create-tutorial/