PlayMaker Study Session #2: Processing Large Numbers of Files Using Arrays
This article is a translated version of my original post on Qiita. Original (Japanese): https://qiita.com/segur/items/10387b874cb4e28667af
PlayMaker Study Session #2: Processing Large Numbers of Files Using Arrays
We are conducting PlayMaker study sessions aimed at STYLY scene creators in-house! Since it's a useful resource, we decided to share the materials publicly!
This article covers the materials from the second session, but even if you haven't read previous articles, you can still benefit from this one! If you're interested, please read on!
PlayMaker Study Session Series
- Session #1: Avoiding Many-to-Many Connections
- Session #2: Processing Large Numbers of Files Using Arrays ← This Article
- Session #3: Modifying Materials at Runtime
Handling a Large Number of Files at Once
Sometimes you may want to place a large number of image files in a scene, as shown in the diagram below. (The numbers are images, not uGUI Texts.)
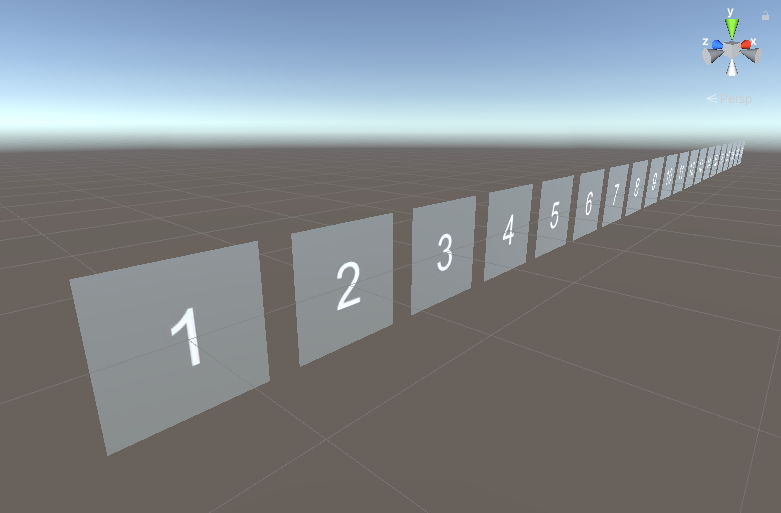
In the example above, there are 20 files.
Editing 20 GameObjects or Materials is a painstaking task. Especially if you need to replace images, the workload becomes enormous.
In such cases, try using PlayMaker's Array!
What is an Array?
An Array is a system that allows you to manage multiple data of the same type within a single variable.
graph TB
  A["Array"]
  A --> B["Element 0"]
  A --> C["Element 1"]
  A --> D["Element 2"]
  A --> E["Element n"]
Each piece of data is called an Element. Elements are ordered like 0, 1, 2, ... .
Note that counting starts from 0, not 1 (this is common in programming, not just PlayMaker).
Creating an Array
To create an Array in PlayMaker, you first need to create a variable to store it.
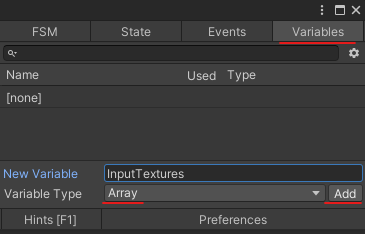
Open the PlayMaker Editor and select the Variables tab in the top right.
Enter the name of the Array in the New Variable field. Since we want to store multiple images (textures), enter InputTextures.
Set Variable Type to Array and click Add.
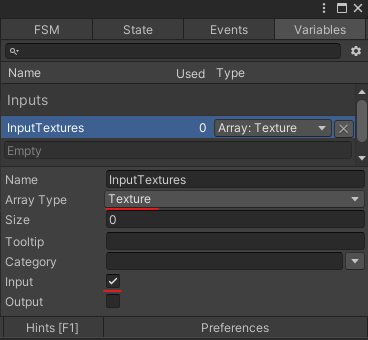
In the Array Type field, select the type of elements in the Array. Since we are dealing with image files, choose Texture.
Checking Input makes it appear in the Inspector, which is handy.
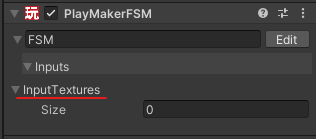
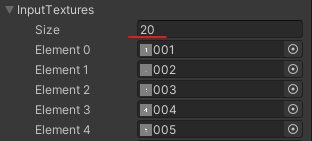
In the Size field, specify the size of the Array (the number of elements it can hold). Enter 20 to handle 20 images.
This creates 20 Elements as shown below.

Set each image file one by one to these 20 Elements!
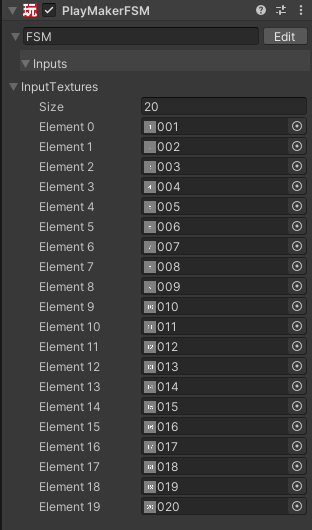
(The element numbers start from 0, but the image file names start from 1, so there's a misalignment in numbering. This is not a mistake.)
Setting all 20 Elements is complete! This completes the creation of the Array!
Creating a State
Now let's actually use the Array to create a process!
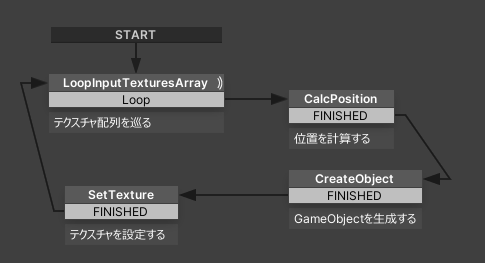
For each element of the array, we'll implement the following process:
- Calculate position
- Generate a GameObject
- Set the texture
Retrieving Elements from the Array
By using the Array Get Next action, you can retrieve elements from the Array!
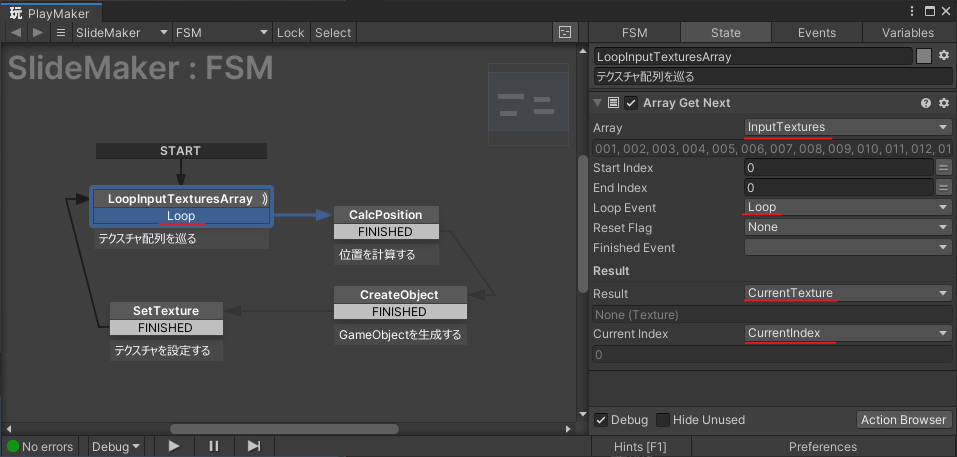
First, in the Array field, select the Array InputTextures you created.
In the Loop Event field, create and set an event called Loop. Since there are 20 elements, this Loop event will fire 20 times.
In the Result field, create and set a variable called CurrentTexture. This will hold the Array elements!
Initially, Element 0 is stored, and each time a Loop event fires, Element 1, 2, ... are sequentially stored in this variable.
Current Index will store the element number!
Calculating Position
For example, if you want to place an image along the x-axis at 1-meter intervals in the scene, like this:
| Element | x-coordinate | y-coordinate | z-coordinate |
|---|---|---|---|
| Element 0 | 0 | 0 | 0 |
| Element 1 | 1 | 0 | 0 |
| Element 2 | 2 | 0 | 0 |
| ... | ... | ... | ... |
| Element 19 | 19 | 0 | 0 |
In such cases, using the element number makes it easy to achieve!
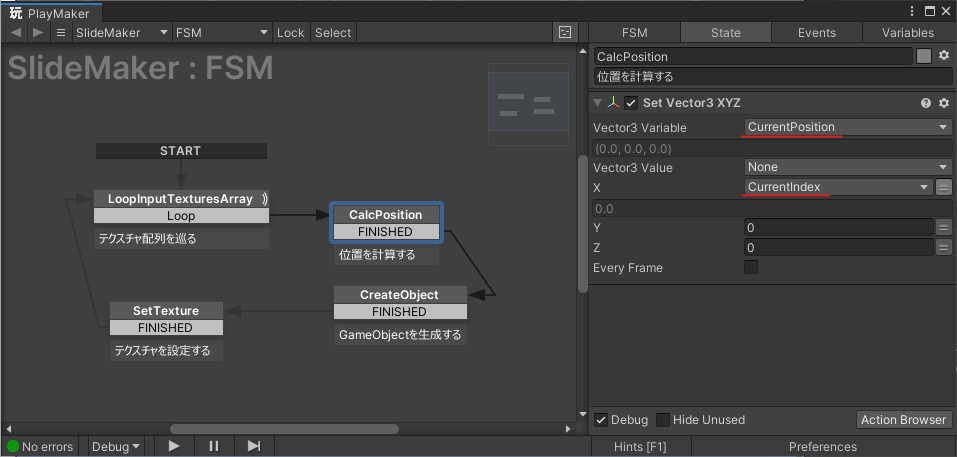
As shown above, just set CurrentIndex in the X field of the Set Vector3 XYZ action!
The calculated position coordinates are stored in the Vector3 Variable field as the CurrentPosition variable.
Generating a GameObject
Generate a GameObject to match the position. This can be done using the Create Object action.
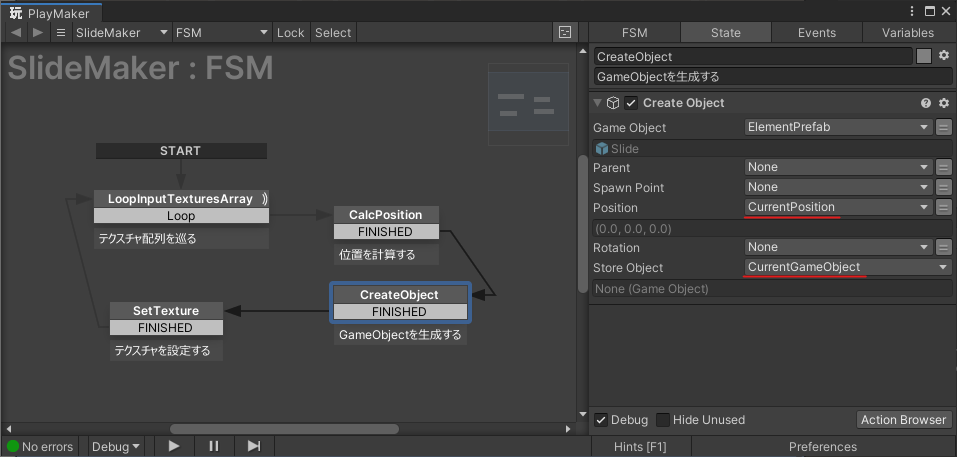
First, create a prefab template and set it in the Game Object field.
Next, set the CurrentPosition variable in the Position field to generate the GameObject at that position!
The generated GameObject is stored in the CurrentGameObject variable set in the Store Object field.
Setting the Texture
Now, let's set the texture!
Use the Set Material Texture action for this.
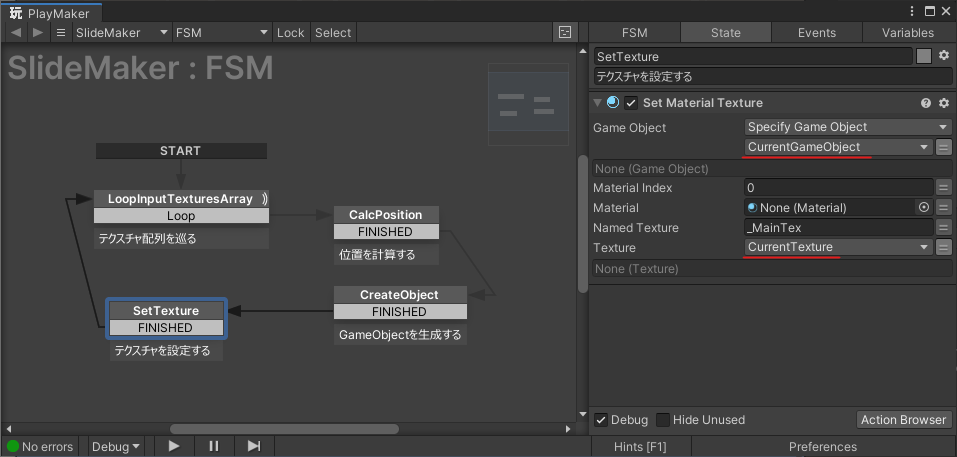
Set CurrentGameObject in the Game Object field.
Set CurrentTexture in the Texture field.
With this, the texture is applied to the generated GameObject!
When you run the scene, multiple images will be placed as shown! Goal achieved!
When You Add More Images
If the number of images increases, don't worry.
Simply increase the Size of the Array, and you can accommodate more without changing the process at all!
This showcases the benefits of using Arrays!
Uses for Arrays
Utilizing Arrays allows you to achieve various tasks, such as:
- Managing instances of multiple enemy GameObjects.
- Keeping track of a list of items.
There are many ways to use them, so feel free to get creative!
In Conclusion
That's all for this session! Well done!
Next time, the focus will be on material control! We hope you can apply it in practice too!
https://qiita.com/segur/items/fae40e8e5fbab10d739f
In creating this article, the following article was referenced! Thank you for the clear information!