Exploring Eye Tracking on VIVE Pro Eye Using the SRanipal SDK
This article is a translated version of my original post on Qiita. Original (Japanese): https://qiita.com/segur/items/3a18b5f41d19f8e1af1d
Originally, I was planning to write a different article, but having gotten my hands on a VIVE Pro Eye, I decided to try out the SRanipal SDK, which I had been interested in for its eye tracking capabilities.
What is VIVE Pro Eye?
The VIVE Pro Eye is a VR headset capable of eye tracking, an advancement over its predecessor, the VIVE Pro.
What is SRanipal SDK?
The SRanipal SDK is designed to track users' eye and lip movements. However, the VIVE Pro Eye alone does not support lip movement tracking.
According to a video from HTC VIVE's official YouTube channel about GDC 2019, SRanipal is apparently pronounced as Esu-Aru Aniparu.
System Requirements
I verified the following setup:
- Windows 10 64-bit
- Unity 2018.4.2f1
- SteamVR 1.6.10
- SRanipal SDK 1.0.0.0
Downloading the SRanipal SDK Eye
You can download it from the following link: Intro To SRanipal SDK
Follow the instructions to reach a page where you can download SRanipal_SDK_1.0.1.0_Eye.zip. (Do not mistakenly download the Lip variant, as I did!)

Introducing the SDK to Your Project
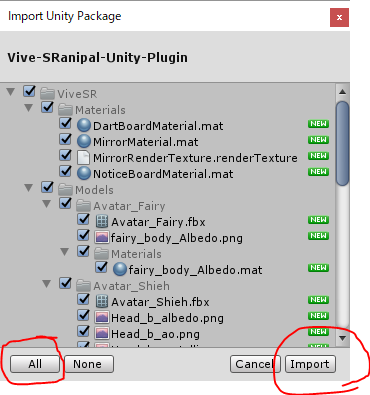
Create a new project in Unity and import 02_Unity\Vive-SRanipal-Unity-Plugin.unitypackage from the downloaded zip file.
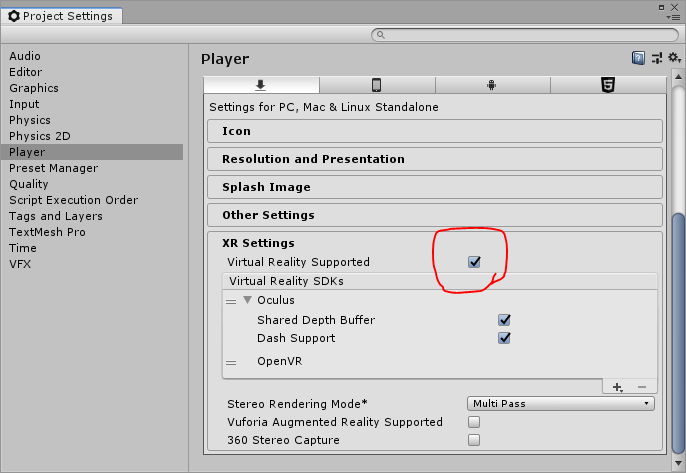
Activate Virtual Reality Supported via Edit → Project Settings → Player → XR Settings.
Calibrating for Eye Tracking
Open Assets\ViveSR\Scenes\EyeSample and play the scene.
When wearing the headset, if calibration is needed, a dialog will prompt you to proceed. Follow the instructions to calibrate.
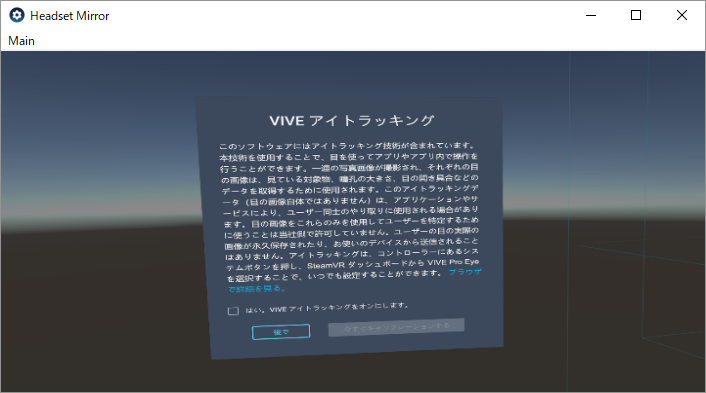
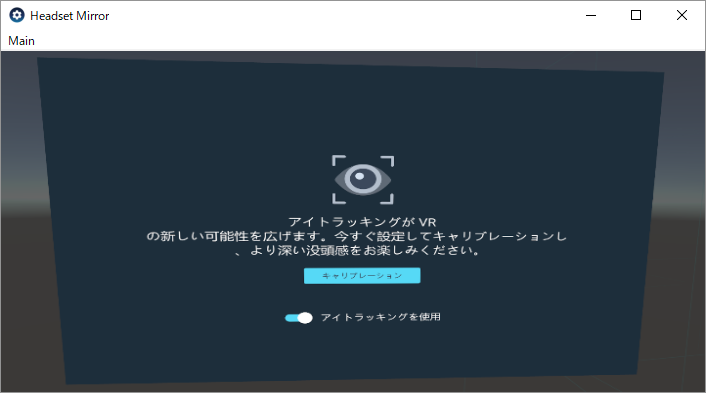

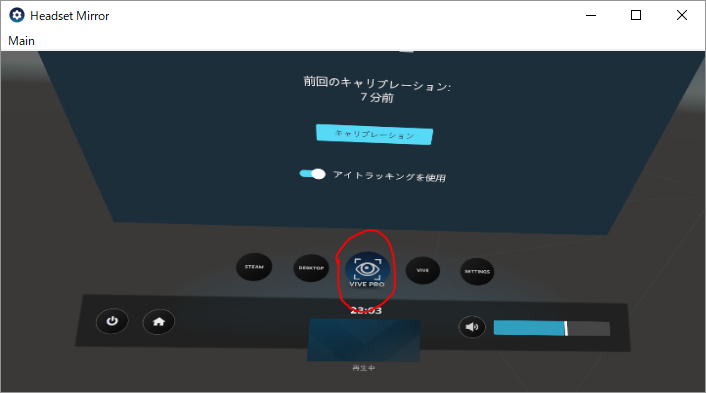
A blue dot lights up indicating the calibrated gaze direction! You can redo the calibration later under the VIVE PRO section.
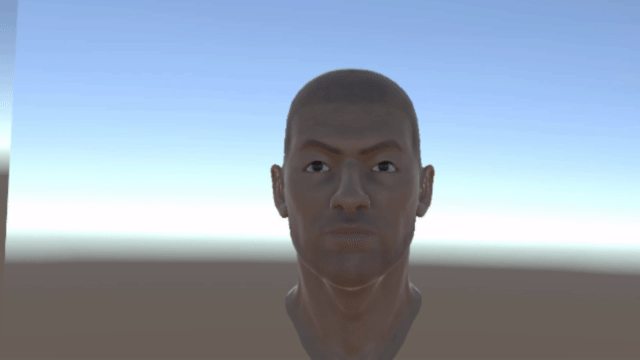
Upon closing the dialog, you'll see this view:
Trying the Sample Scene
Reopen Assets\ViveSR\Scenes\EyeSample and play the scene.
You'll be greeted by an avatar in a mirror that's tracking your eye movements.
Creating Your Own Scene
Let's recreate the sample scene with an avatar of a female instead of the male one. Start by opening Assets\Scenes\SampleScene in Unity 2018 (or create a new one).
Adding Game Objects to Your Scene
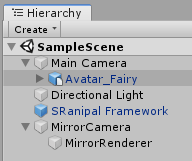
Add the following to your scene:
- Place
Assets\ViveSR\Models\Avatar_Fairy\Avatar_FairyunderMain Camera. - Place
Assets\ViveSR\Prefabs\SRanipal Frameworkat the root. - Create an empty object named
MirrorCameraat the root. - Create a
QuadnamedMirrorRendererunderMirrorCamera.
Your Hierarchy should look like this:
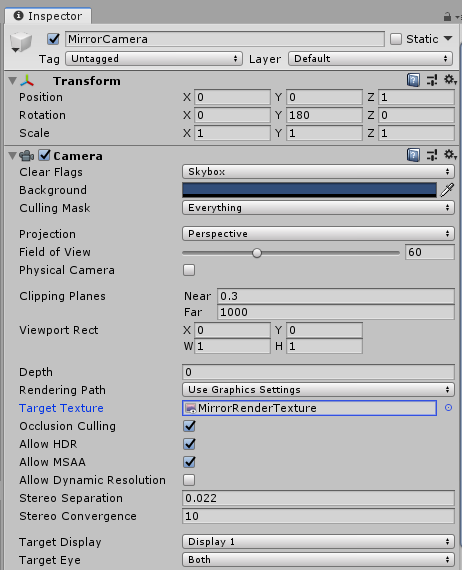
Editing the MirrorCamera
Add SRanipal_MirrorCameraSample_Eye to MirrorCamera.
Add a Camera component and set Target Texture to Assets\ViveSR\Materials\MirrorRenderTexture.
Adjust Transform settings to rotate 180° on the y-axis.
Editing the MirrorRenderer
Set Mesh Renderer’s Materials to Assets\ViveSR\Materials\MirrorMaterial.
Adjust Transform to flip the X scale to -1.
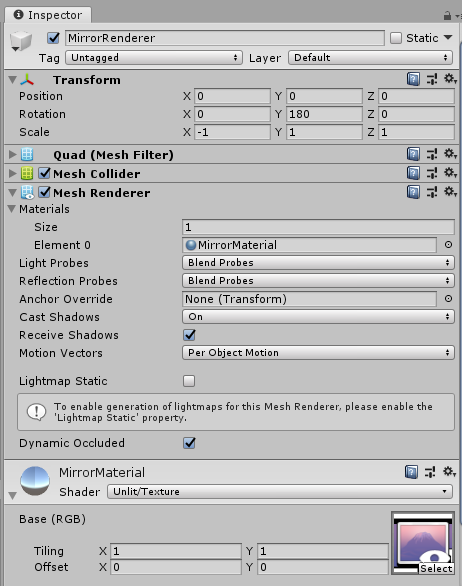
Now the mirror is done!
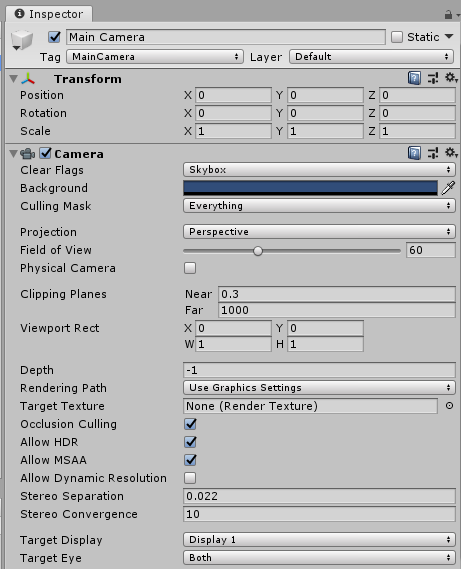
Editing the Main Camera
Set the Transform as follows:
Editing the Avatar_Fairy
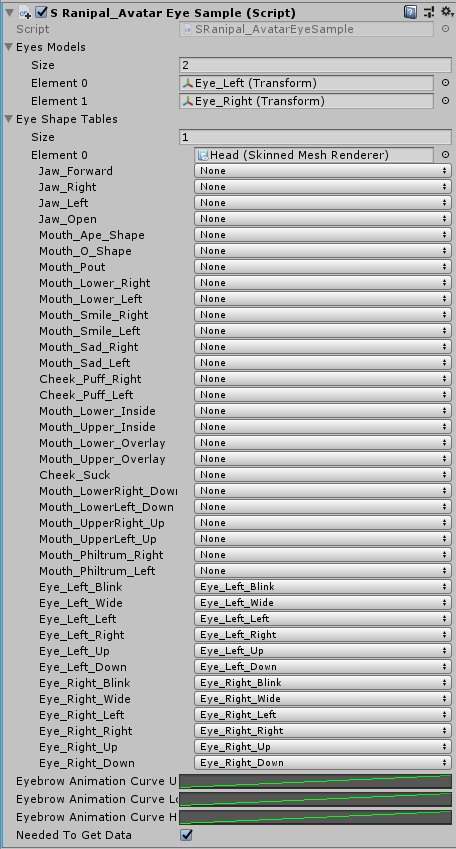
Add a SRanipal_AvatarEyeSample component to Avatar_Fairy.
Set Eyes Models size to 2 with the following elements:
Element 0:Avatar_Fairy/Eye_Left_grp/Eye_LeftElement 1:Avatar_Fairy/Eye_Right_grp/Eye_Right
Set Eye Shape Tables size to 1 with:
Element 0:Avatar_Fairy/Head
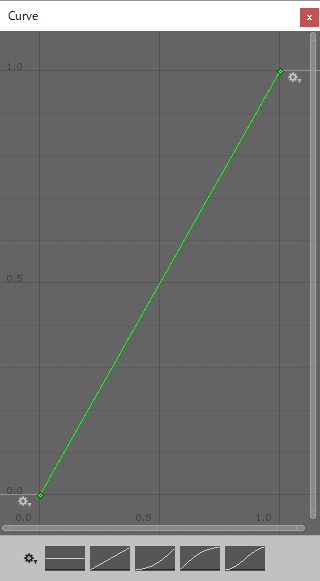
Click the right box in Eyebrow Animation Curve Upper, draw a curve in the Curve dialog. A straight line should suffice initially.
Repeat these steps for Eyebrow Animation Curve Lower and Eyebrow Animation Curve Horizontal.
And there you have it!
Playing the Scene
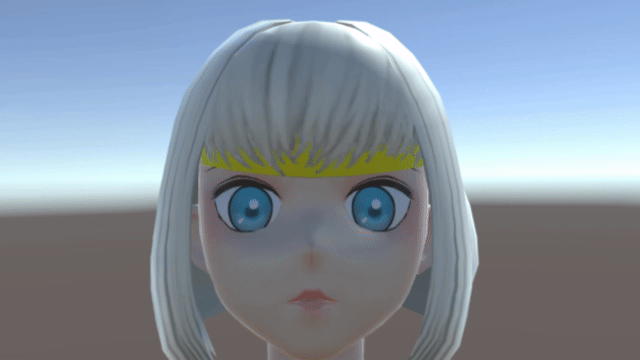
When you play the scene, it should look like this!
The eye movements might seem a bit eerie... Adjusting the Eyebrow Animation Curve might help improve the appearance.
Conclusion
I successfully implemented eye tracking in Unity.
In creating this article, I referred to the following resources: