Unity Scene Size Reduction Study Meeting Part 2: Textures
This article is a translated version of my original post on Qiita. Original (Japanese): https://qiita.com/segur/items/4559edc2e0d4353204d9
Unity Scene Size Reduction Study Meeting Part 2: Textures
This article is part of the materials for the second session of the Scene Size Reduction Study Meeting, but it's okay if you haven't read the first session! If you're interested, I would appreciate it if you read the first session as well!
Unity Scene Size Reduction Study Meeting Series
- Unity Scene Size Reduction Study Meeting Part 1: Sorting by Size
- Unity Scene Size Reduction Study Meeting Part 2: Textures ← This Article
- Unity Scene Size Reduction Study Meeting Part 3: Models
- Unity Scene Size Reduction Study Meeting Part 4: Animations
Re-evaluate Texture Settings!
Reducing Unity scene size is crucial to ensure smooth performance even on devices with lower specs. In most Unity projects, textures occupy a substantial portion of the file size, so let's proactively optimize textures!
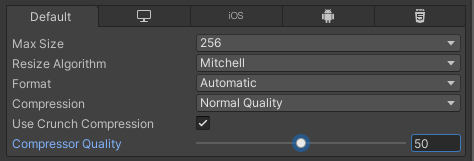
When you select a texture file, the Inspector window displays the following settings:

I will explain these settings this time.
These settings are used when building the project and do not affect the original texture file, so feel free to experiment with different changes!
Recommended Values
For those who want to know the recommended settings quickly, here are the values I suggest:
| Property | Recommended Setting |
|---|---|
Alpha Source |
None for opaque images From Gray Scale for grayscale masks otherwise Input Texture Alpha |
Generate Mip Maps |
OFF for UI images ON for others |
Max Size |
Aim for 1024 or below |
Resize Algorithm |
Mitchell |
Format |
Automatic |
Compression |
Normal Quality |
Use Crunch Compression |
ON |
Compressor Quality |
50 |
I'll explain each in order.
Check Current Build Size
At the bottom of the Inspector window, the texture image is displayed as a preview.
If you look closely, the size is shown in red as in the diagram below. This is the current size after building.
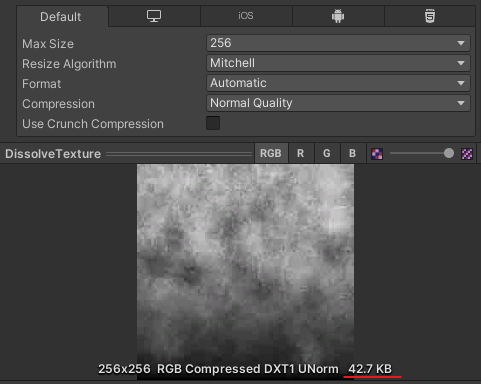
Use this preview image and size as a reference while making adjustments!
Alpha Source
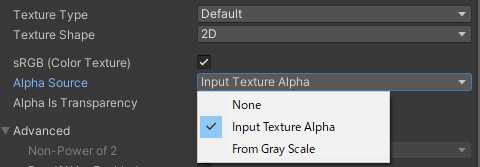
Alpha Source is an option to specify where the opacity of the texture is acquired from.
| Alpha Source | Function | Size | Use Case |
|---|---|---|---|
None |
No transparency | Low | Opaque images |
Input Texture Alpha |
Opacity from A channel | High | Transparent PNGs |
From Gray Scale |
Opacity from RGB average | Low | Grayscale masks |
graph LR
    subgraph RGBA Color
        R
        G
        B
        A
    end
    subgraph Grayscale
        GrayScale[RGB Average]
    end

    R -->|Average| GrayScale
    G -->|Average| GrayScale
    B -->|Average| GrayScale

    subgraph "Input Texture Alpha case"
        A -..-> Alpha1[Opacity]
    end
    subgraph "From Gray Scale case"
        GrayScale -.-> Alpha2[Opacity]
    end
If not using transparency, select None to reduce size!
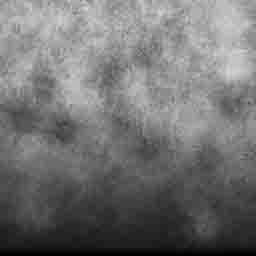
For grayscale mask images like the one below, select From Gray Scale!
Generate Mip Maps
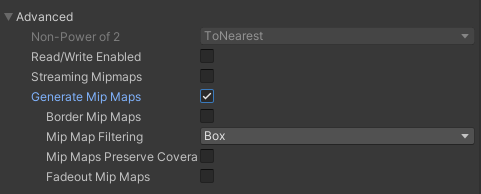
Generate Mip Maps decides whether to create mipmaps.
Mipmaps are a series of images that are half, a quarter, an eighth, etc., the size of the original texture.
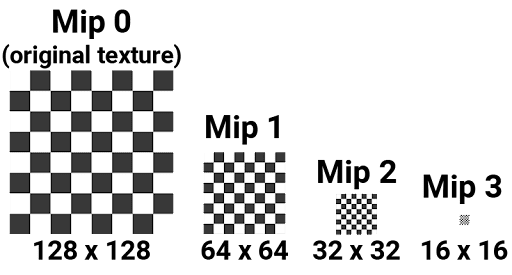 |
|---|
| Image Source: Unity Documentation / Introduction to Mipmaps |
High-resolution textures far away can cause jaggies. Using smaller resolution images for distant objects mitigates this and also reduces rendering load.
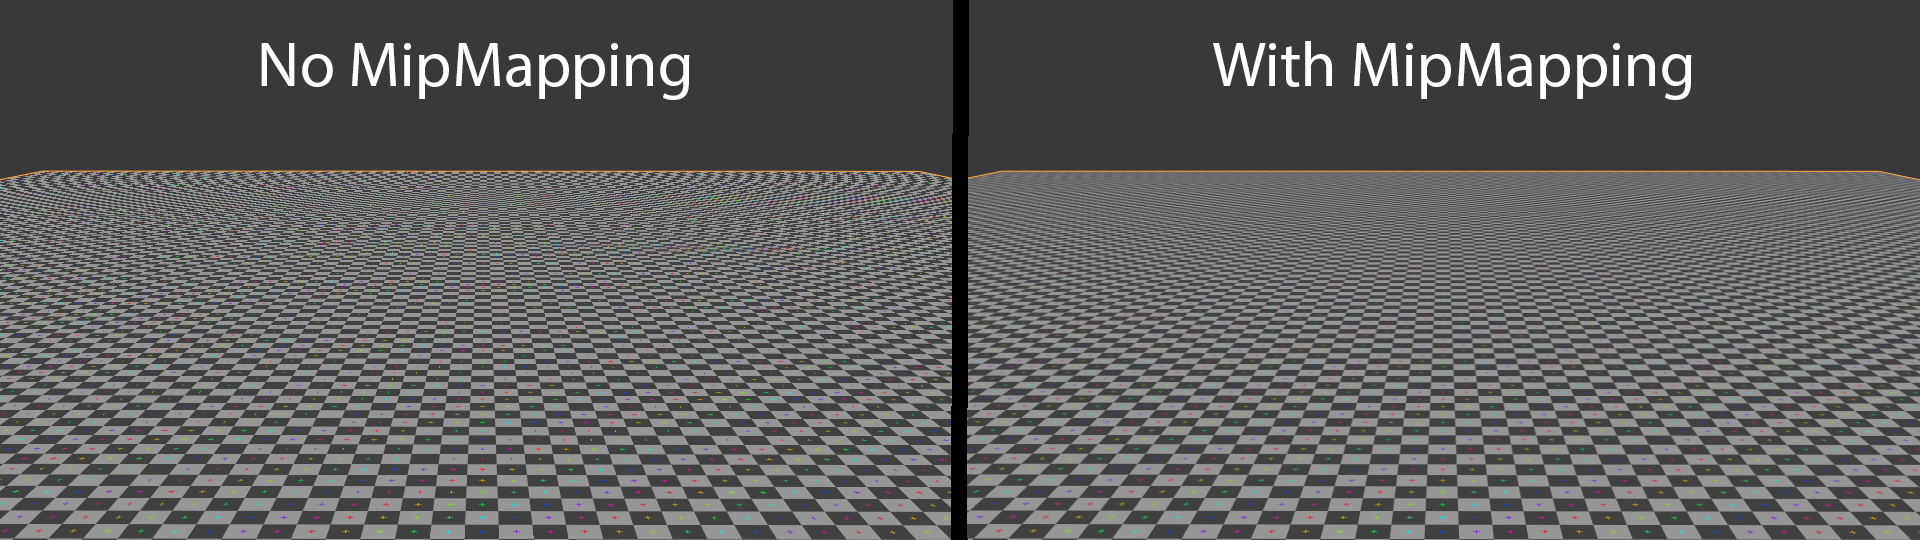 |
|---|
| Image Source: Wikipedia / Mipmap |
However, mipmaps need to be stored separately from the original texture, increasing scene size. So, for textures not rendered at a distance, not using mipmaps can reduce the size.
For example, UI images are never rendered far from the user, so turn mipmaps OFF!
Max Size
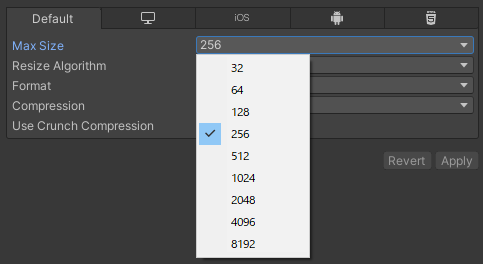
Max Size is the maximum resolution of the texture.
If the original texture resolution is larger than the value specified in Max Size, Unity shrinks the texture to the Max Size value.
graph LR
    A[Original Resolution<br>1024] -->|Max Size<br>512| B[Resolution After Build<br>512]
Conversely, if the original texture resolution is smaller than the value specified in Max Size, increasing Max Size won't improve quality, so be careful.
graph LR
    A[Original Resolution<br>256] -->|Max Size<br>512| B[Resolution After Build<br>256]
The smaller the Max Size, the less size it consumes, but image quality decreases, so it becomes a trade-off between appearance and performance.
Values are available in 32, 64, 128, 256, 512, 1024, 2048, 4096, 8192. Powers of two are used because GPUs can efficiently process them.
How Large Should Max Size Be?
The appropriate value depends on the texture's purpose, so there's no one-size-fits-all!
However, I personally feel that when it's 2048 or more, it's worth verifying if that resolution is truly necessary.
Images Less Affected by Low Resolution
Humans are sensitive to brightness changes but less so to color or transparency changes, so images like those below are less affected by low resolution.
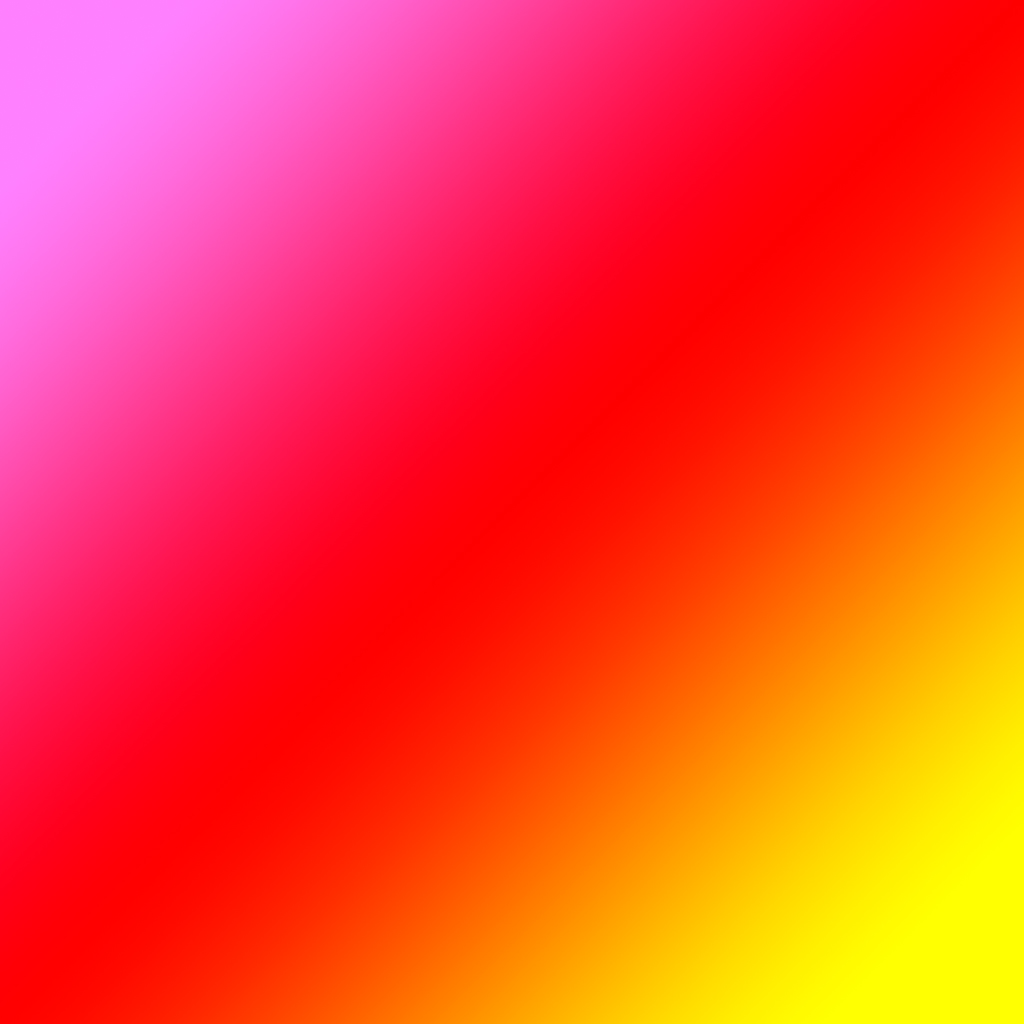
Example: Gradient Images
Images like the one below don't have drastic brightness changes, so lowering the resolution is typically fine.
Example: Grayscale Mask Images
People are said to be less sensitive to changes in transparency, so grayscale mask images like these can often be lower resolution.
Resize Algorithm
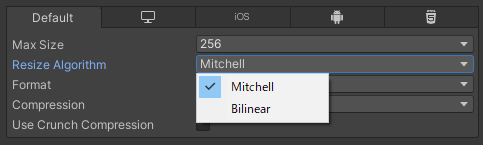
Resize Algorithm is the algorithm used to downscale the texture resolution.
Two options are available:
Bilinear |
Mitchell (Mitchell-Netravali) |
|---|---|
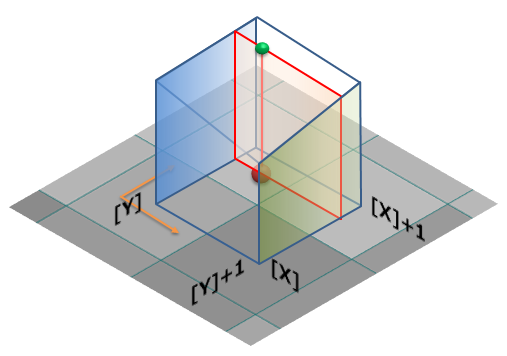
| Bilinear interpolation | A type of Bicubic interpolation |
 |
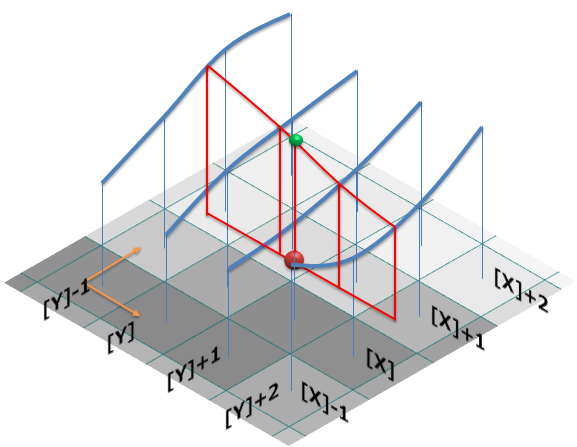 |
| Based on colors of surrounding 2x2 pixels | Based on colors of surrounding 4x4 pixels |
 |
 |
| Tends to be jaggy but retains sharpness | Tends to smoothen but may appear blurry |
| Image Source: Methods for Pixel Interpolation (Nearest neighbor, Bilinear, Bicubic) |
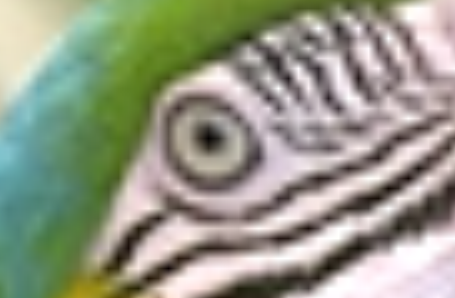
The above images show enlargements which make differences clear, but when downscaled, the differences are usually subtle. I tried both methods for shrinking, but honestly, I couldn't recognize any differences.
Therefore, I think you can stick with the default Mitchell!
However, if ringing (unnatural edges occur at highly contrasting areas like text) bothers you, switching to Bilinear might resolve it.
Format
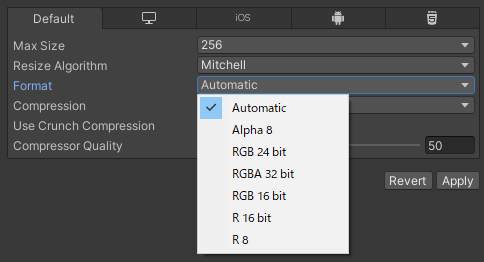
Format determines how pixels are represented.
Here are the options available:
| Format | R | G | B | A | bpp | Use Case |
|---|---|---|---|---|---|---|
Automatic |
- | - | - | - | - | Unity automatically selects the optimal one from below |
Alpha 8 |
❌ | ❌ | ❌ | 8bit | 8bit | Mask images |
RGB 24bit |
8bit | 8bit | 8bit | ❌ | 24bit | Opaque images, true color |
RGBA 32bit |
8bit | 8bit | 8bit | 8bit | Transparent PNGs | |
RGB 16bit |
5bit | 6bit | 5bit | ❌ | 16bit | Reduce size compared to RGB 24bit, high color |
R 16bit |
16bit | ❌ | ❌ | ❌ | 16bit | Height maps |
R 8 |
8bit | ❌ | ❌ | ❌ | 8bit | Grayscale images |
With so many options, it can be confusing, but Automatic is generally safe!
Be cautious if it's unintentionally set to RGBA 32bit since RGBA 32bit is extremely heavy and should be avoided if not dealing with transparent images.
For grayscale images, selecting R 8 might also be viable.
Compression
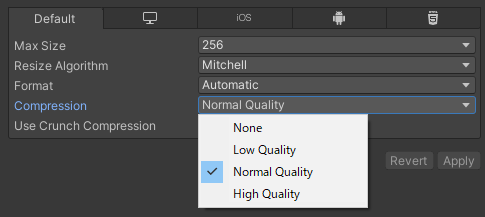
Compression is the type of compression applied to textures. There are 4 levels:
| Compression Type | Texture Quality | Size |
|---|---|---|
Low Quality |
Low | Min |
Normal Quality |
Mid | Mid |
High Quality |
High | Max |
None |
Best | Max |
Lowering quality with a smaller size is possible, but image quality declines, becoming a trade-off between appearance and performance.
None doesn't compress, achieving the best image quality at the risk of significantly deteriorating performance.
Use Crunch Compression
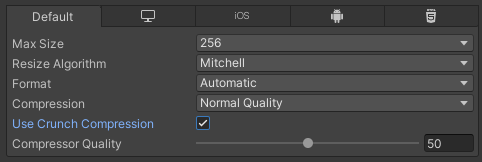
Use Crunch Compression determines whether to apply Crunch compression.
It can be set if Compression is not None.
The GPU can't read JPEG or PNG files directly, so textures are converted into formats like DXTC or ETC specialized for GPUs.
Crunch compression further compresses these DXTC or ETC formats.
While some detail might be lost, it significantly reduces size while maintaining overall quality!
Compressor Quality
Compressor Quality determines Crunch compression quality.
It can be set if Use Crunch Compression is checked.
Higher numbers mean better texture quality but result in larger sizes, creating a trade-off.
From what I've researched, many people set this to 50.
In Conclusion
That's all for this session! Thanks for your hard work!
Next time, we'll cover the Model section! I hope you continue to put this into practice!
https://qiita.com/segur/items/550af881e7e8d5470b92
This article referred to the following pages. Thank you for the detailed explanations!
- Unity Documentation / Texture Import Settings
- Unity Documentation / Recommended, Default, and Supported Texture Formats (by Platform)
- Unity Documentation / Texture Compression Formats
- Unity Documentation / Introduction to Mipmaps
- Method Summary for Reducing Build Size in UNITY Applications
- What I Know About Texture Compression in Unity
- Pixel Knowledge to Artistically Process Images
- Does Crunch Compression Speed Up Load Times in Unity?
- 20 Ways to Reduce App Size in Unity
- Capacity Reduction Tips
- Pixel Interpolation Knowledge
- Methods for Pixel Interpolation (Nearest neighbor, Bilinear, Bicubic)
- Wikipedia / Mipmap